

I went to change my oil in the lower unit of my 2004 BF225 (purchased used 2 years ago) and it had water in the case with the oil. It turns out the gear case has severely corroded, and the wall of the shift shaft is where it is leaking. The wall was actually missing in about 3 spots and you could see the o-ring. So, I'm replacing the gear case. In the process of removing the gear case 2 of the 6 bolts broke off in the extension case and I have not been able to get them out (broke 3 different extractors in the process, yay!). I was curious at how much would need to be done to take the extension case off to get a better angle to work on it and when I removed the plastic outer covers, there is severe corrosion on it as well. The lower mount housings were eaten through in several places and the extension case itself is pitted pretty badly, so I'm planning to replace it as well (probably used that isn't showing much corrosion). After reviewing the service manual and searching through the forum here, I still can't figure out a couple of things. I really don't want to have to take the extension case off to figure it out until I'm actually ready to replace it with the parts in hand.
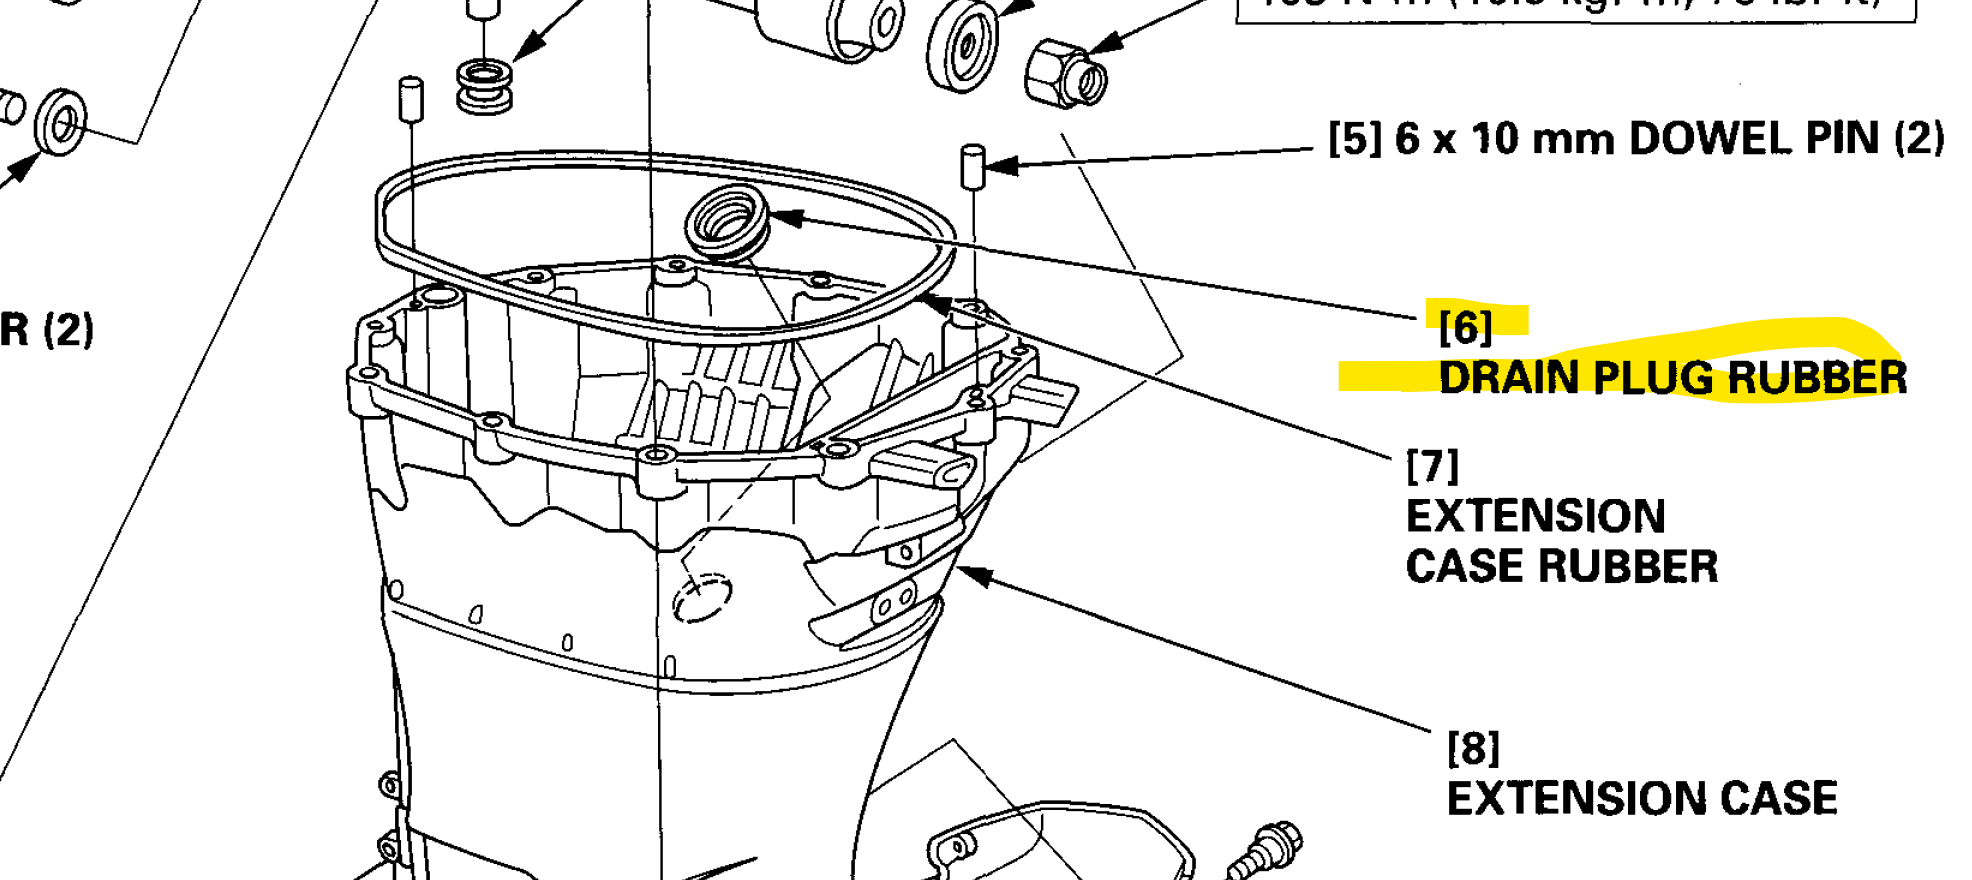
1) Where does the "Extension Case Rubber" as it is called in the manual (in mine it's on page 12-88, snip posted below) actually go? In a picture on next page of the manual, it shows this nesting in a groove, however in looking at several photos of the part, it doesn't appear to have a groove where it would sit on the top of the unit and in the parts diagram, it doesn't look like it the seal is large enough to fit around the top of the extension. All diagrams I can find show it hovering over the extension case between it and the mount case.
Is it actually this?
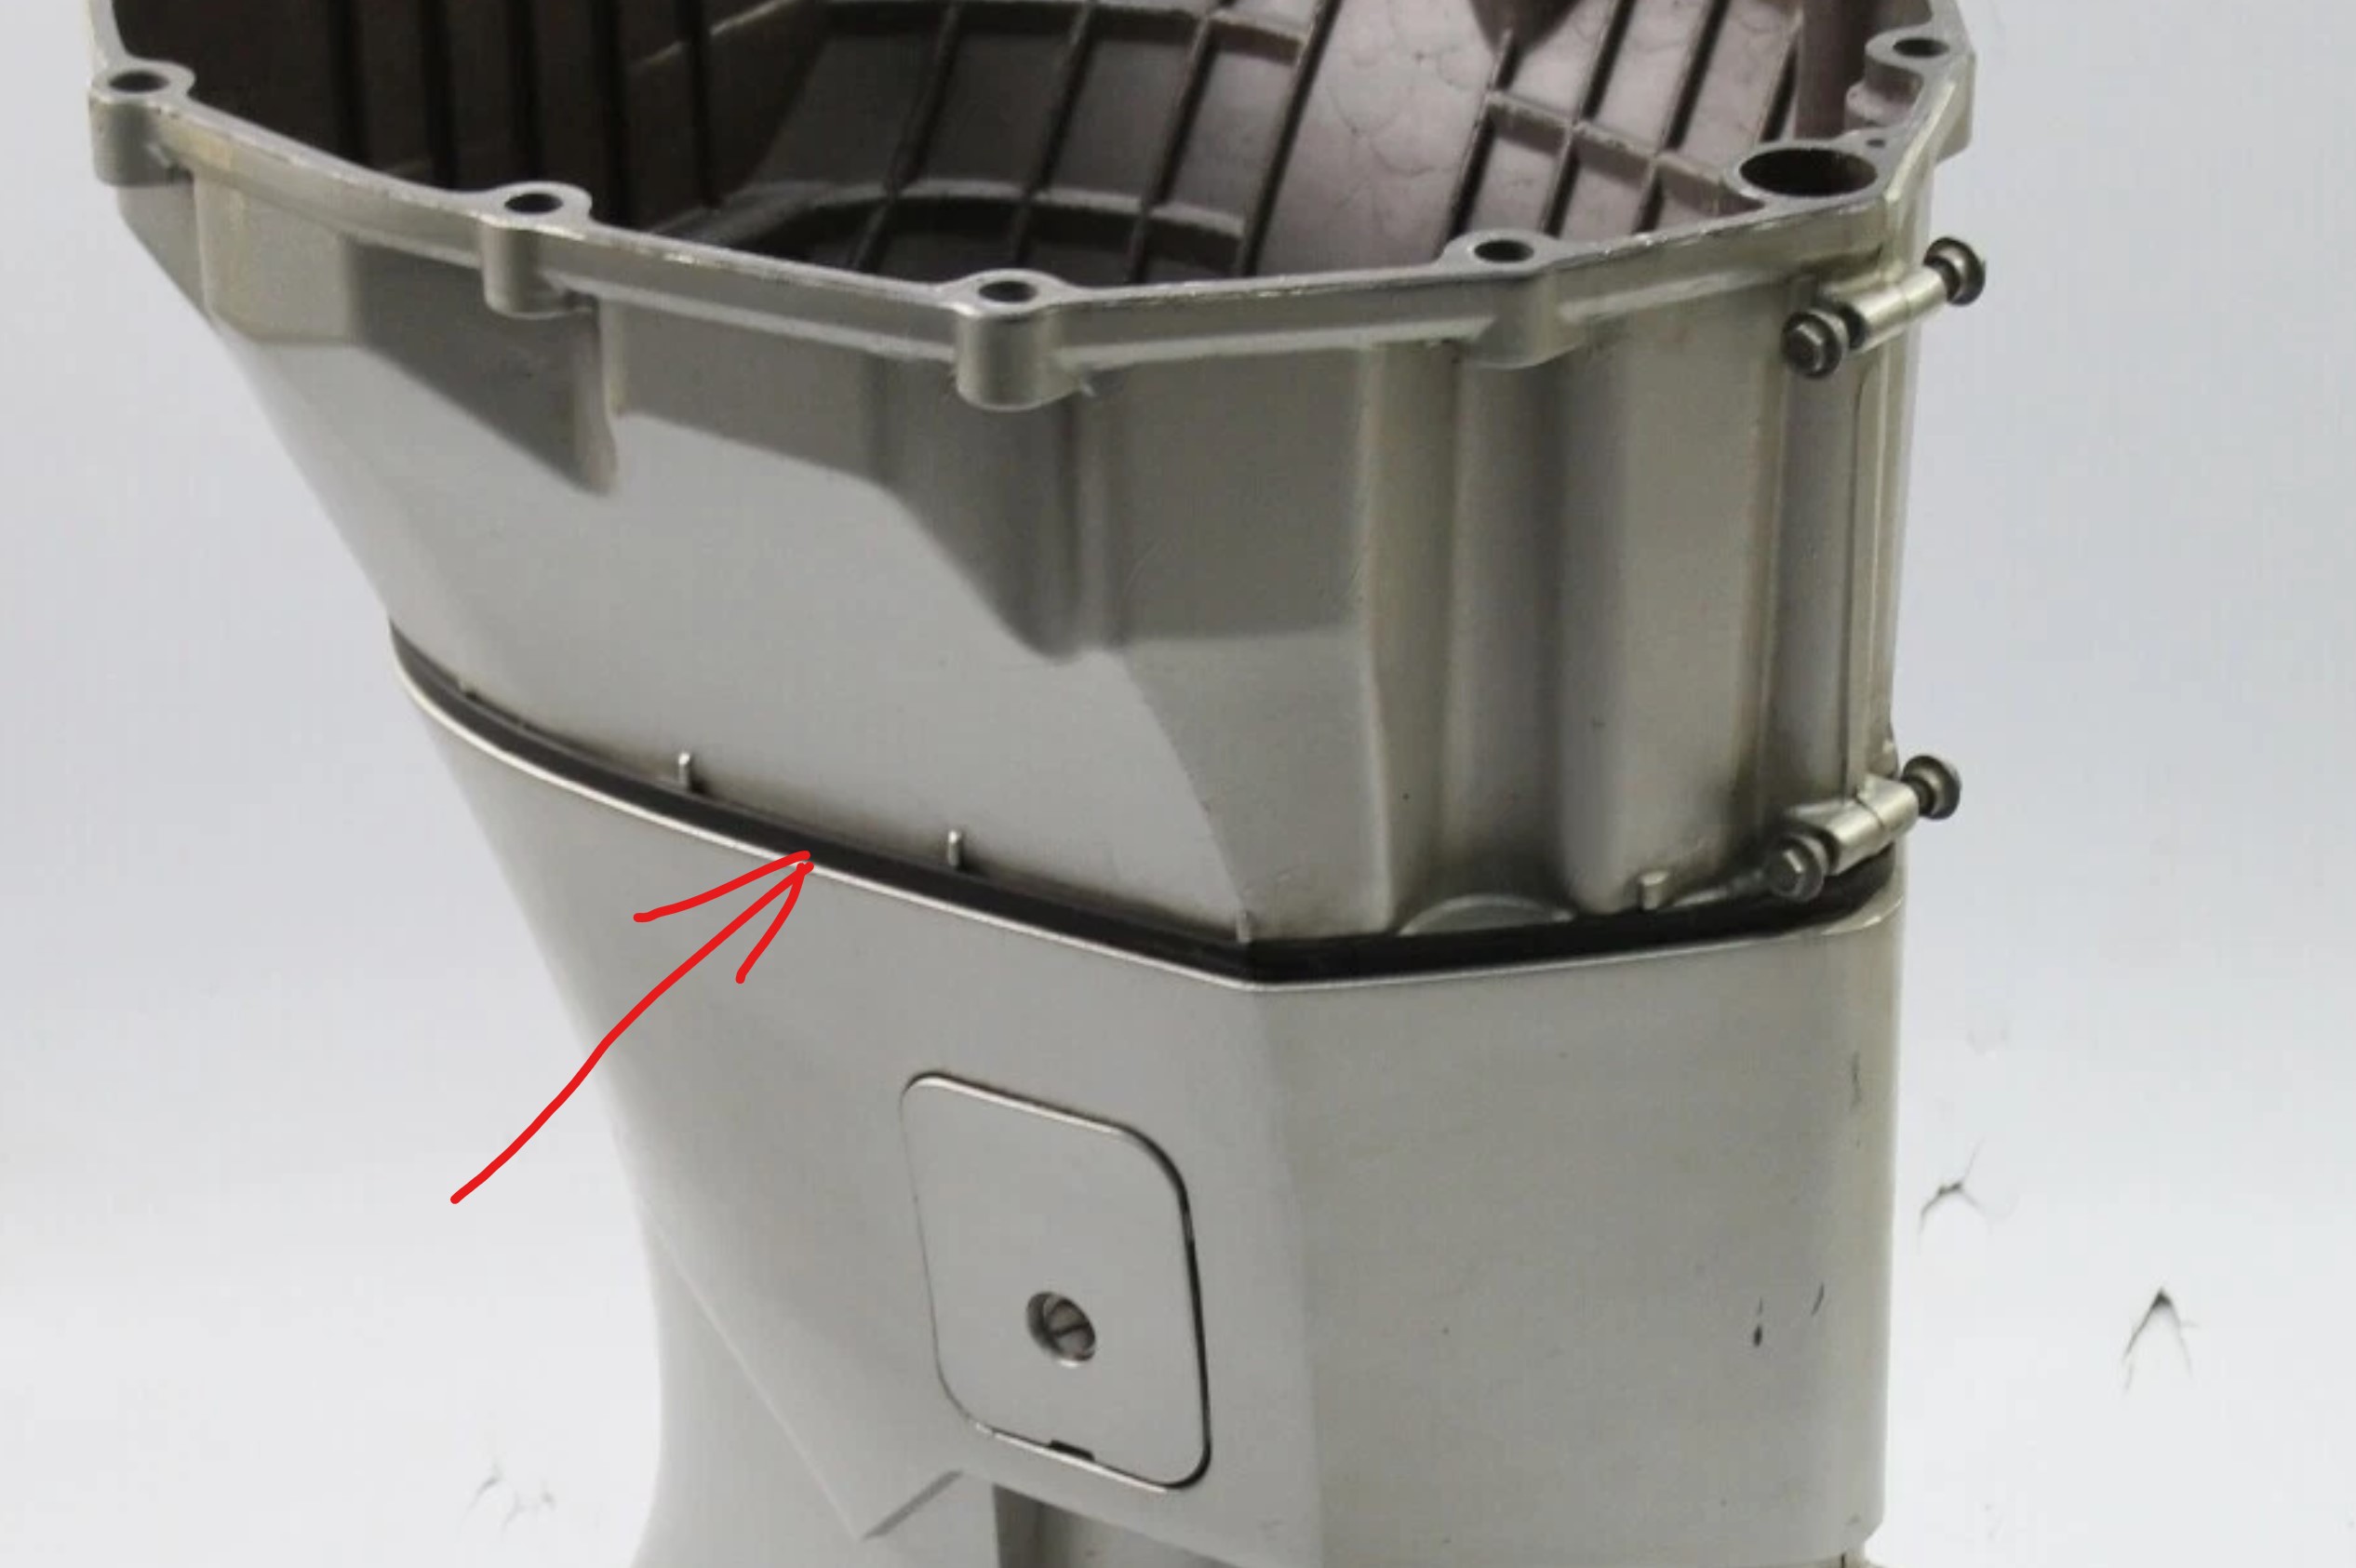
In a picture on the next page of the service manual, it points to this location and says to "apply adhesive between the right 3rd knock and left 3rd knock on the backside of the motor"
2) in the instructions, it says to use ThreeBond 1530C to install this. I can't seem to find any of it. Anyone know of an equivalent?
3) I've seen several folks talking about SB#56 and replacing the exhaust pipes. I have no way of knowing if this was actually done, but was thinking while I have all this stuff off, it might be a good idea to drop the oil pan and replace that stuff as well. Does anyone have a copy of it? I can't seem to actually locate it on the forum.
Thanks in advance for any answers.
1) Where does the "Extension Case Rubber" as it is called in the manual (in mine it's on page 12-88, snip posted below) actually go? In a picture on next page of the manual, it shows this nesting in a groove, however in looking at several photos of the part, it doesn't appear to have a groove where it would sit on the top of the unit and in the parts diagram, it doesn't look like it the seal is large enough to fit around the top of the extension. All diagrams I can find show it hovering over the extension case between it and the mount case.
Is it actually this?
In a picture on the next page of the service manual, it points to this location and says to "apply adhesive between the right 3rd knock and left 3rd knock on the backside of the motor"
2) in the instructions, it says to use ThreeBond 1530C to install this. I can't seem to find any of it. Anyone know of an equivalent?
3) I've seen several folks talking about SB#56 and replacing the exhaust pipes. I have no way of knowing if this was actually done, but was thinking while I have all this stuff off, it might be a good idea to drop the oil pan and replace that stuff as well. Does anyone have a copy of it? I can't seem to actually locate it on the forum.
Thanks in advance for any answers.
