Logo

Shift cable adjustment driving me crazy

Selkirk_D

New member
So I replaced the lower shift cable on my 1978 Spectra with a Mercruiser 260 outdrive, and I cannot get the cable adjusted to where it will shift into reverse without pulling on the shift plate arm. Followed the manual, it shifts into forward but reverse is “click click click”. If I pull shift arm away from anchor plate, reverse will lock in. If I move pivot pin up in the slot, it’s better, but still won’t lock in reverse on its own. What am I missing? Is this an alpha? Is this an MR? Different procedures for both and I’ve tried them both. Same result. If I adjust cable to where reverse engages reliably, then forward clicks,
 
Last edited:
1st of all 1978 was a MerCruiser 1 drive, not a R/MR or Alpha.
However, the "service replacement" drive from Mercury is a Alpha 1.
So what is installed nearly 50 years later??????
Regardless, your shift interface is the short shaft style which uses the 6" initial adjustment.
I suspect you are NOT pushing & pulling the slack out of the cable from the helm as required during each step.
If all is correct, expect the pin to be adjusted most of the way up the slot.
BTW, why did you replace the cable to start with?
 
1st of all 1978 was a MerCruiser 1 drive, not a R/MR or Alpha.
However, the "service replacement" drive from Mercury is a Alpha 1.
So what is installed nearly 50 years later??????
Regardless, your shift interface is the short shaft style which uses the 6" initial adjustment.
I suspect you are NOT pushing & pulling the slack out of the cable from the helm as required during each step.
If all is correct, expect the pin to be adjusted most of the way up the slot.
BTW, why did you replace the cable to start with?
Because it was 50 years old.
 
Because it was 50 years old.
There is NO WAY the cable was 50 years old.....................That said,

What was the cable part number you purchased and where did you purchase it?

Older designs the cable threaded into bell housing from transom side. ALL newer designs thread into bell housing from drive side.

WE NEED TO KNOW MORE ABOUT WHAT YOUR WORKING WITH?
What manual/procedure are you using?
 
I agree with kghost, the boat is 50 years old but highly unlikely the cable was original. Do you know the boat's history?

Yours was at the time of manufacture a "thread from the transom side design". It is possible to & typically replaced with the newer "thread from the drive side" cable assembly. This retro fit requires a special tap to chase the threads in the bell housing. If not threaded deep enough, you will not be able to get enough travel for full reverse engagements. However you say you can get reverse if you operate the cable by hand, so if you used the retro fit cable it's unlikely your issue.

All adjustments should be made with drive down, steering reasonably straight. But down is the important issue. Revisit the procedure from the start & like I said before verify you are pushing & pulling the slack from the front cable as specified.

I have no idea if your boat has a MerControl or some Morse or Teleflex unit. Is the front cable original? Does it have too much slop causing a loss of travel?
 
Here is my written procedure. I have used this for many years. If it fails then the basics of cable install or worn linkage parts are responsible.

As mentioned above, When tightening the Brass threaded cable fitting into bell housing from drive side - ONLY 1-2 threads should be visible (~1/16" to 3/32").


Procedure:
Trim outdrive up 2 inches from all the way down. This puts slight resistance/stretch on short cable. I have found this to work best on a new cable install.

Take keys out of ignition!!!!!!!!!!!

Have a second person stand at the prop.
You, remove the short shift cable from the shift bracket. The one that goes to the outdrive.
After the cable has been removed, push the plastic cable end all the way in and hold in place while prop is being spun C’Clockwise..
Have second person rotate prop counter clock wise until the prop is fully engaged and wont turn anymore. Maintain light effort on shift cable plastic end pushing it to keep forward engaged.

Measure the distance from the center of the brass Barrel to the center of the round mounting hole in the plastic end. Adjust Barrel to make that distance 6 inches. No more No less!

In cases where the shift cable is old but still works well you can adjust this dimension to 5 15/16”. NO MORE.

** Older drive systems May have a shorter set distance I believe 5 7/8” but you must be sure your drive is that old I am not sure how old that is.

***To short of adjustment ( less than 5 15/16) will cause shift cable to continue to move when applying throttle when it should not and could activate the shift interrupter switch.

Put shift control handle in forward FULL WIDE OPEN throttle position.
Remove the Control shift cable from shift bracket at this time.

Install Short shift cable back onto shift bracket at this time. (This is for alignment and adjustment of the control cable to the short cable)

Take the shift control cable and adjust the Barrel so it fits perfectly back into the shift bracket.
Before completely installing it turn the brass Barrel 3-4 complete turns away from the plastic end and reinstall into shift bracket and install the nuts but do not tighten at this time.

Now put shift control handle in the neutral position.
Have second person spin prop, it should spin freely.
Put shift control into the forward detent position at ~ 10:00 position. NO FURTHER.
Have the second person rotate the prop counter clockwise. You should have solid engagement with no ability to continue to turn the prop.

Now shift back into neutral. Prop should spin freely with no clacking or clunking.

Now shift to reverse to the ~2:00 o’clock detent position NO FURTHER!!

Have the second person spin the prop clockwise.

If you have positive engagement with no clunking or jumping out of engagement, you are done.
If it does not fully engage into reverse than look at the shift bracket where the short shift cable end mounts and there is a slot. Loosen the 7/16 hex that is touching the bracket and move the stud so you are pulling the short cable then re-tighten nut. Retest the 2:00/Neutral/10:00 shift test as described above.

If this all works then tighten all nuts down making sure the cable end washers move freely and the nuts are not tight against the shift cable ends. The studs must spin freely inside the cable ends so if the washers are slightly loose then this is correct.

Try this and retest in water under load.
 
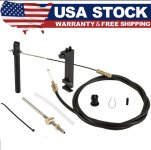
Thanks for all your help. The history is this I am the third owner. Original owner sold boat to 2nd owner in 1980. They used it a fair amount and took good care of it. Always stored indoors. Has ~700 hrs , both owners kept pretty good maintenance records, but no record of cable or bellows being replaced. So when I got it, I pulled drive, did bellows, cable, impeller before I tried to take it out. So maybe cable was replaced at sometime, but I have no record of it. Cable is pictured below,
Sierra 18-2603, screws into Gimbal housing from drive side. I was using SELOC manual as a guide (not very well written) , I’ve tried both 5-7/8 and 6 inches. I’ll try the method mentioned above later today. I also just got ahold of the Mercruiser service bulletin 89-4 below which describes some critical measurements and troubleshooting.
 

Attachments

  • IMG_7100.jpeg
    IMG_7100.jpeg
    156.4 KB · Views: 8
  • Shift cable adjustment.pdf
    428.4 KB · Views: 10
Send me a mesaage with your phone number and a time to call. I am sure your seloc left out many little details that you could have missed.
 
1978, your shift interface adjustment lever has the short slot (about 7/8" vs older long slot about 2").
****ALL SHORT SLOT UNITS USE 6" ADJUSTMEMT.****
5 7/8 was long slot only!!! Forget about this dimension unless there is some evidence your 1978 drive was at some time in the past replaced with a late 60s/early 70s drive.

That cable is the "rear or from the drive end" later style. That being said, was the one you removed threaded the same or opposite?
If it was the same, then it was replaced at least once before as they did not use that style before 1983.
So my questions to you are:
*Which cable type did you replace? *Did you need to chase the threads thru the bell housing or was it previously done & done properly?

That image is NOT Sierra, it is Chineesium crap.
*Did you receive Chineesium crap or Sierra?
*What brands of bellows, impeller & other items did you receive?
 
Spoke with him last night.
His drive is an SEI, he said it had the preload pin vertical drive shaft in lower so it appears to be period correct.

He seems to have a very good mechanical apptitude and understanding of the basics.

I gave him several specific things to look at so he will do so and get back here with his findings.
The shift cable install is from the drive side and the cable removed was perviously installed the same way.

What he will be checking,
1. Sweep of shift arm (splined bronze) for 45* of sweep from 12:00 (fwd) to 9:00 (Rev). to see if its within spec.

2. The backwards F part mounted on cable end with set screw and safety wire is set properly, not to loose and not to tight.
3. Shift bracket side of cable, confirm steel tube is threaded all the way in. Confirm core cable tip is allbthe way into plastic end and seen clearly in view hole above the cable pinch screws/barrel.
4. Check control cable for slop, 2 7/8 - 3 1/8". Checked with cable only removed from bracket and all bends still in cable to show actual distance as installed.
5. Put short cable slot stud in center of travel before starting adjustment procedure
6. If all above is OK the follow my written procedure again and report back with results.

Note: He did NOT water test boat before replacing cable so he has no idea if issue was already present.
 
Back
Top